Basic Guide to Getting Started with Pay Per Call Affiliate Marketing
Pay per call is a form of affiliate marketing where the affiliate is paid for live phone calls if they meet the requirements of the end buyer.
These requirements can be as simple as a consumer staying on the phone for 5 seconds, to staying on the phone for 3 minutes. Duration is the standard metric most affiliate networks will use to pay their affiliates for phone calls.
Pay per call marketing has been around since the newspaper and radio days, but in recent years with the popularity of the internet and mobile phones, it has been making a bit of a comeback.
Even though it's been coming back quite strong, it's hard to find much free information online about how to get started. Most of the pay per call guides are paid/outdated, or both.
Today I'm going to show you how to get started doing pay per call affiliate marketing with my basic guide. I refer to this as the basic guide because while this will give you a good starting point to learn the ropes, you can get far more advanced than this.
Basic Guide to Getting Started with Pay Per Call Affiliate Marketing
Requirements:
- Server to upload landing pages to (I use Instapage for this task)
- A domain
- Google Ads Account
- $3,000+ to spend on ads
- Basic knowledge of HTML/CSS
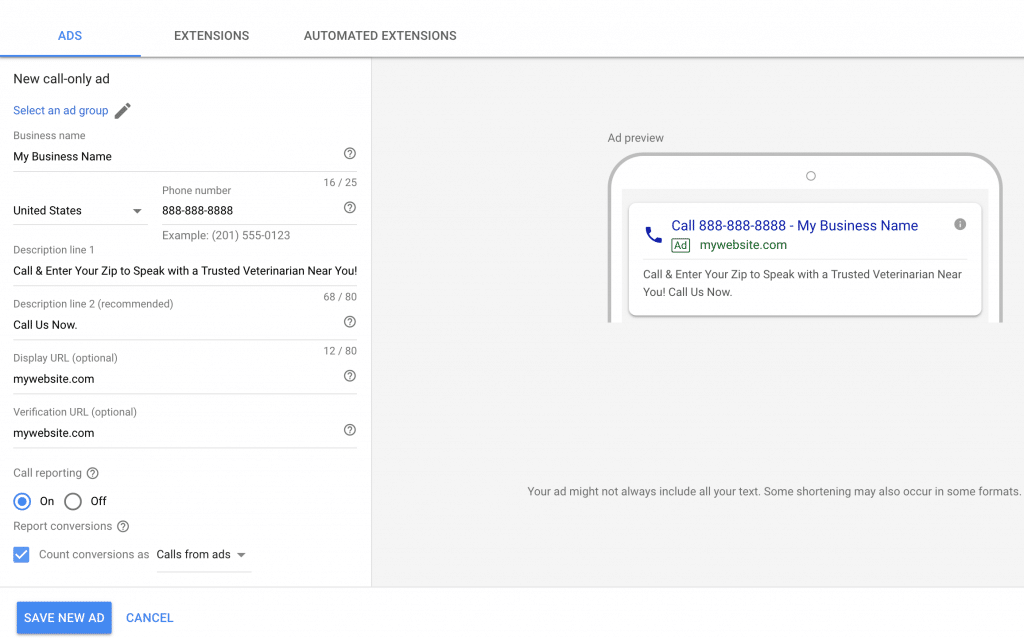
UPDATE 2019: You basically need to use call tracking software in 2019 to be able to run call-only ads. There is a new policy that requires you to state the business name at the start of the phone call. Almost all call tracking software will allow you to do this with a custom recording. You can also use text-to-speech (not recommended).
Step 1: Apply for An Affiliate Network
There are a ton of different affiliate networks in the pay per call space. Some will focus on a particular vertical (insurance, finance, etc.), some will be 'masters' of all verticals, and some will be pretty heavy in the broker business.
You want to find an affiliate network that is as direct to the advertiser as they possibly can be. If you don't locate the most direct offer, you won't get paid as much as you deserve for the phone calls you generate.
A lot of networks will broker the offers that other networks have, and pay you less because they need some of that sweet, sweet margin too.
It's pretty crazy you can find an offer at one network, then the same offer or something remarkably similar is at another network for double or more payout.
When you are just starting out, I suggest that you only work with 1 or 2 quality PPCall networks. If you spread yourself too thin over several networks, it could be a while before you get paid.
Why pick just 1 or 2 quality networks? Some networks have a minimum threshold to get paid, so if you have $400 earned at ten networks and they don't pay until you make at least $500... you'll have $4,000 earned, but you can't access it.
Working with 1 or 2 quality networks will open yourself up to weekly payments (if you meet the minimum revenue requirements), which can help with your cash flow.
If you're struggling to get accepted into an affiliate network, check out this guide I wrote for noobs to get accepted to any affiliate network. Just be honest on your application and show how motivated you are and you should get approved.
Step 2: Decide on What Type of Calls You Want to Generate
The next thing you want to do is decide what kind of phone calls you are going to generate. Calls can be generated in a lot of verticals, so it just depends what you're interested in and if AdWords is viable for that particular niche.
I find that if I could be a potential buyer for a service, it's easier to advertise than something I will never buy in my lifetime.
Do you own a home? Maybe you want to start by promoting home service type offers such as a plumber or electrician? See what I mean?
Whatever you do I'd suggest that you don't find the highest payout offer and think you're going to be a millionaire by next week.
Generally, the higher the payout an offer has, the more money you're going to need to spend to get the data necessary to optimize your Google Ads campaign.
My recommendation here is to pick something that pays under $15. If you're still stuck, here are five tips to choosing a pay per call offer that doesn't suck.
Once you've decided on an offer, get your tracking phone number. If you aren't sure how to do it then you can ask your affiliate manager. They'd be happy to help.
Step 3: Build a Basic Website
You don't have to go too crazy here, as the users will never actually see your website/landing page.
Create the following pages on your website:
- Home (add your unique tracking phone number you got in the previous step)
- Contact Us
- Privacy Policy
- Terms of Use
The contact us, privacy policy, and terms of use pages don't need any CSS styling; they need to exist.
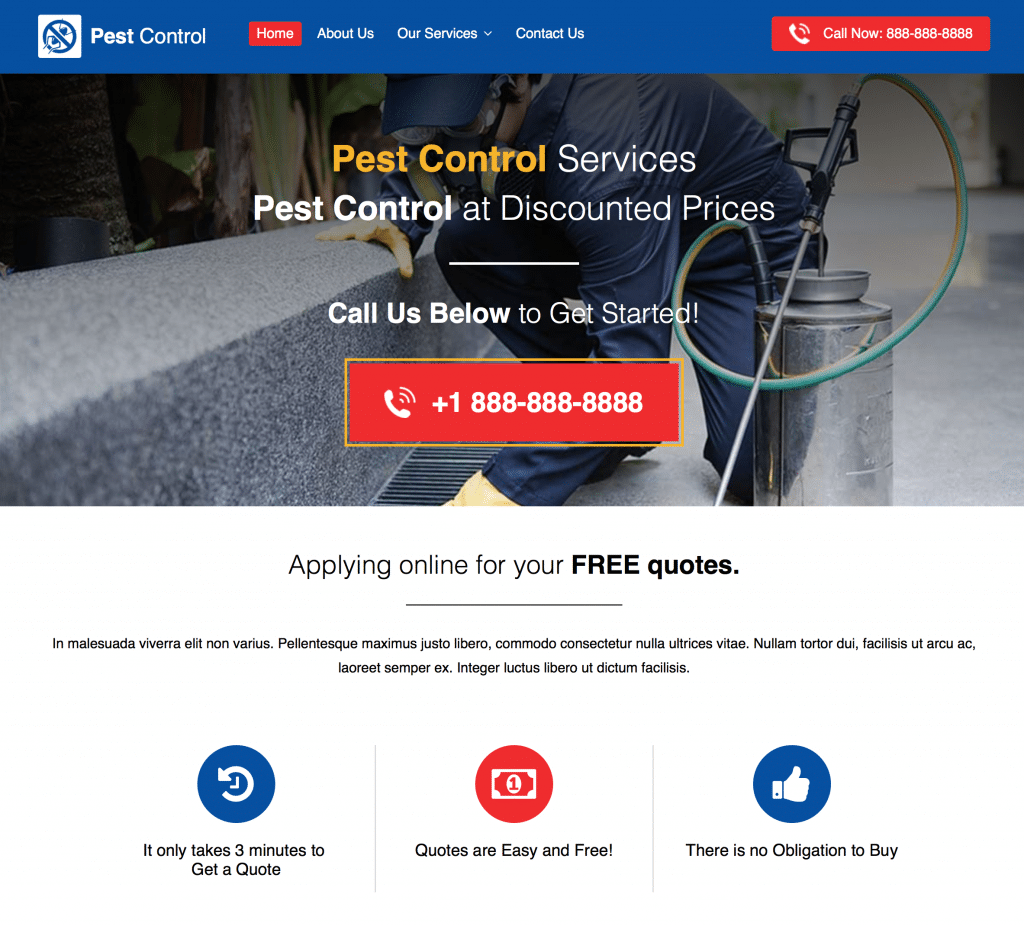
If you don't know where to start, here is a pest control landing page you could edit to your needs and upload to your server.
I use Instapage to create my landing pages/websites. It's a drag and drop landing page builder that makes creating web pages a breeze. I actually think Instapage is a godsend for advanced pay per call.
Note: Ringba is offering 200+ free pay per call landing pages for download here.
Step 4: Create Google Ads MCC Account + Spare Accounts
The first step to make sure you're off on the right track with Google is to create a Google Ads manager account. I'm not going to go into detail about that here because I've already written something up about why this is an important step.
Basically, you want to create an MCC account. From within the MCC, account create new Google Ads accounts for each vertical you're going to promote (insurance, debt, etc.).
I'd suggest creating around 20 accounts when you first get started, so you have backups in case you accidentally get banned (doesn't frequently happen with pay per call unless you're in the risky verticals).
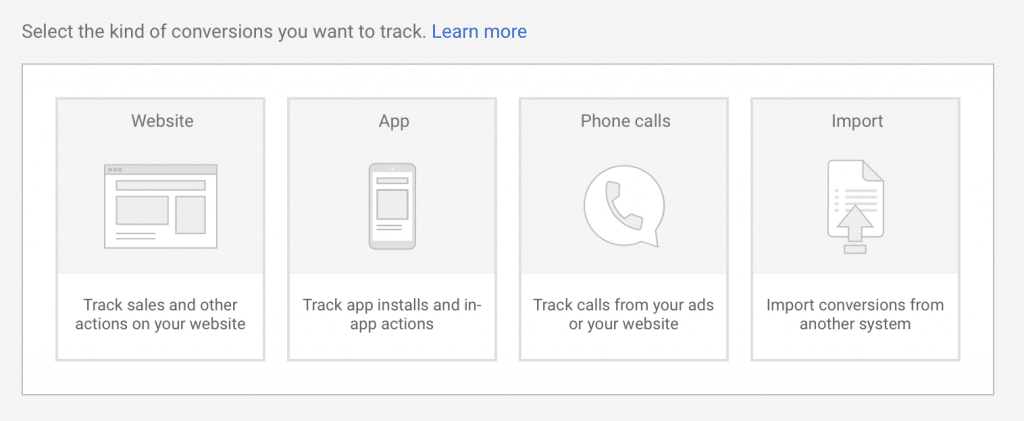
Step 5: Setup a Conversion Action in Your Google Ads Account
As your Google Ads campaign chugs along you aren't going to want to keep bidding for short phone calls that don't meet the conversion requirements (i.e., 2-minute duration).
So to make sure Google Ads only records conversions on the phone calls that meet the required duration you're going to need a phone call conversion action.
Check out this guide to get one set up right now.
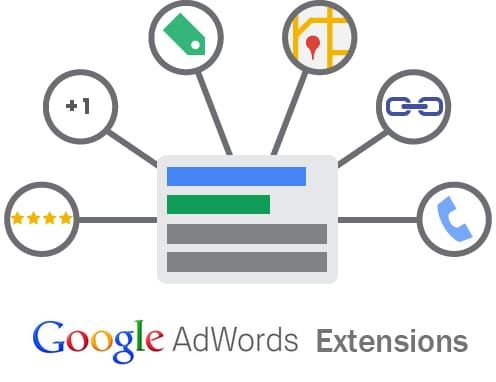
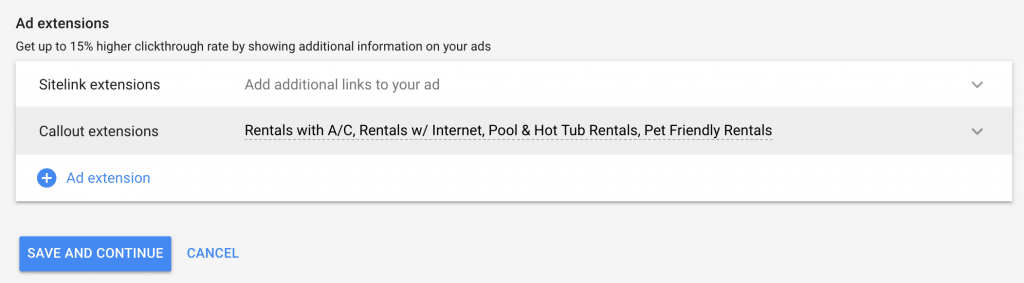
Step 6: Create Google Ads Extensions for Your Call-Only Ads
There are a total of 3 different types of ad extensions that are eligible to show with call only ads - location extensions, structured snippets, and callout extensions.
The callout extensions are the most important. Make sure you have at least 4 of them, but if you can make more than four you should.
Here is some more additional reading about the call-only ad extensions and how to add them.
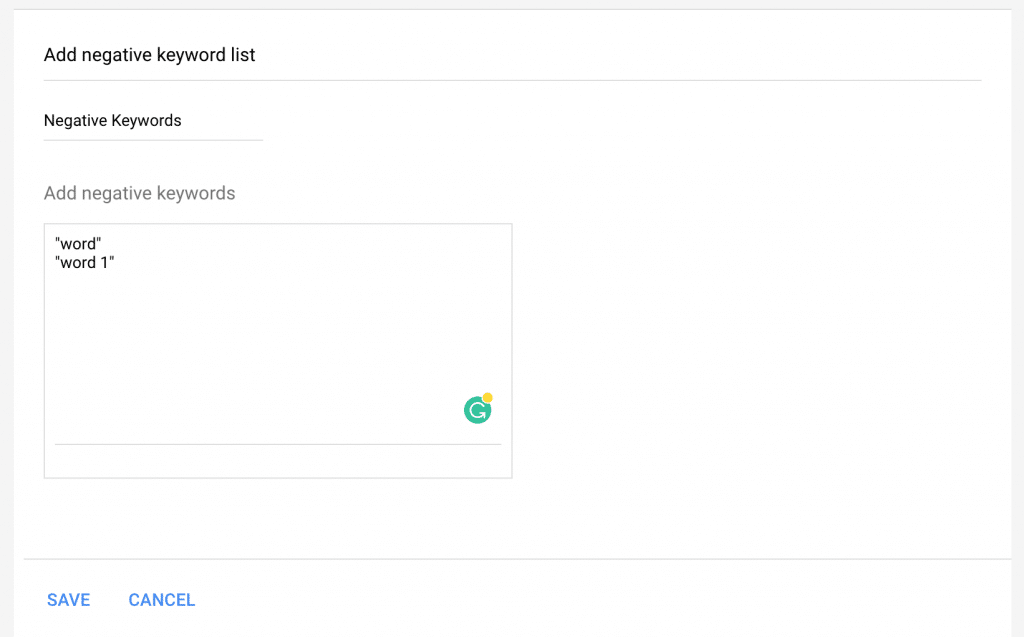
Step 7: Add Negative Keywords to Your Google Ads Account
From inside of your Google Ads account, click "GO TO" in the header and type "Negative Keyword Lists."
Create a new negative keyword list and add in the negative keywords you don't want your ads to show for. Typical things you don't want are people looking for jobs, popular sites like Amazon or Craigslist, people looking for driving directions, address, etc.
Many verticals will share some of the same negative keywords. It's up to you how you organize everything. You can put all the keywords in just one list, or you can break them all up into different lists based on a common theme (i.e., words related to employment).
Don't forget that you're only going to advertise one vertical in this account, so you'd need to move the keyword list(s) to other accounts for other verticals.
Do note that each account has a maximum of 20 negative keyword lists and each list is limited to 5000 keywords.
Negative keywords are essential if you don't have a huge budget. They can literally save you a ton of money. I generally will spend more time on negative keywords than on the actual keywords in the campaign.
Helpful sites for discovering negative keywords:
Step 8: Build Your Google Ads Campaign
Now it's finally time to create your pay per call campaign from within the Google Ads interface. Go to the 'Campaigns' tab and then click the giant blue '+' to create a new campaign.
AdWords seems to be testing different versions of the campaign creation screen, so your screen may look slightly different than mine.
Select the following options. Leave the last three checkboxes blank.
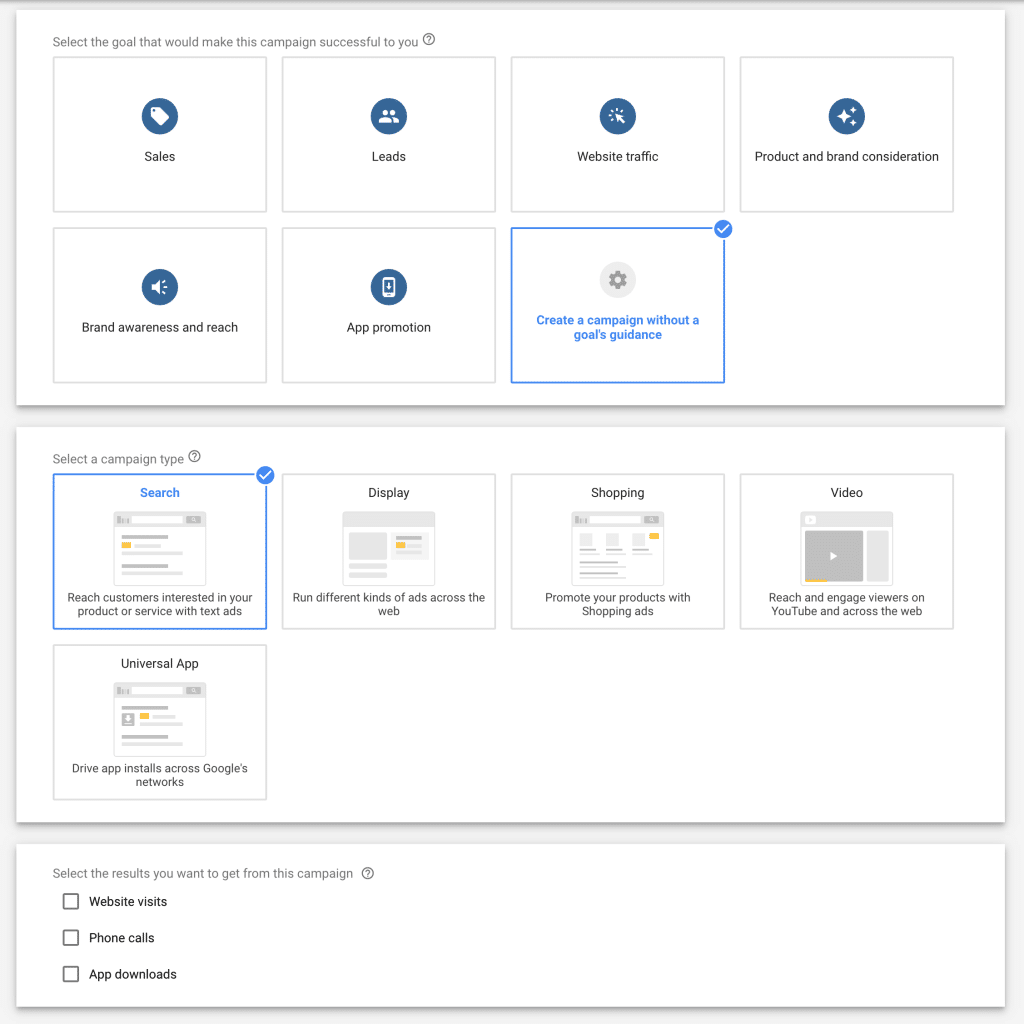
Click "CONTINUE."
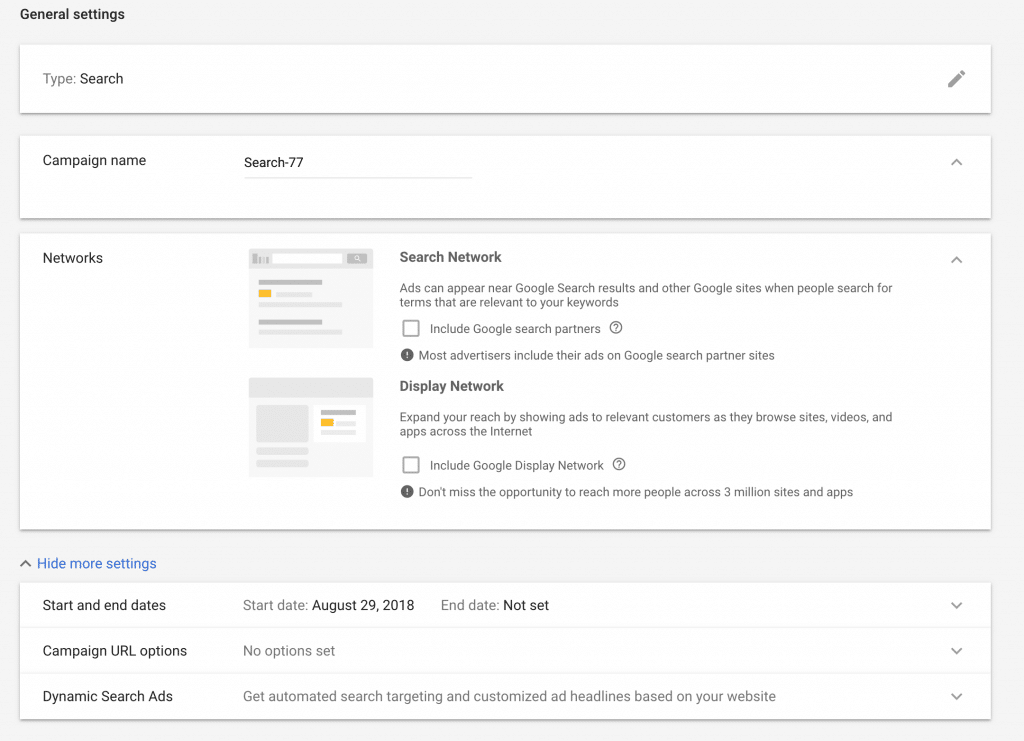
On the next page, you are going to want to uncheck the boxes for "Include Google search partners" and "Include Google Display Network."
The more settings section was unchanged, but I expanded it so you can see.
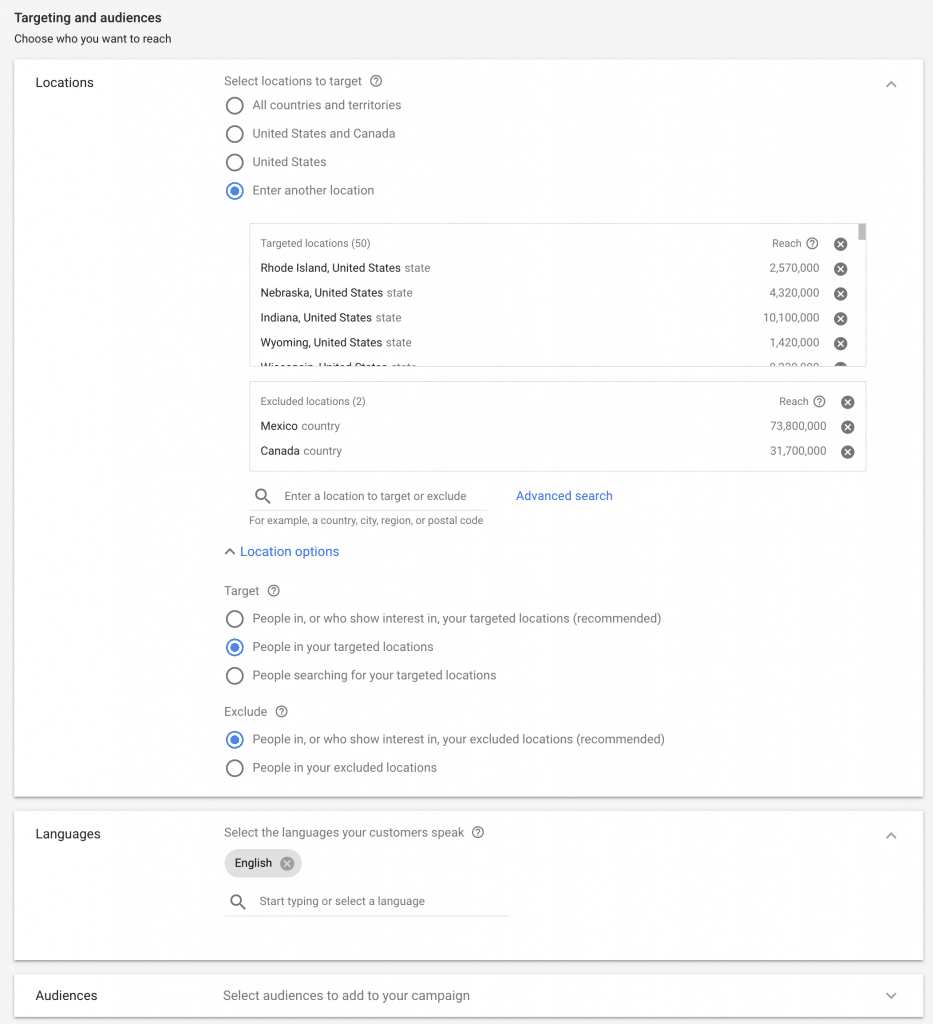
This campaign is being set up assuming the offer accepts calls from all states. We enter all of the states individually because it will make your reporting easier to read when you have data in your campaign.
I don't believe it's necessary to exclude Canada and Mexico, but I do it anyway.
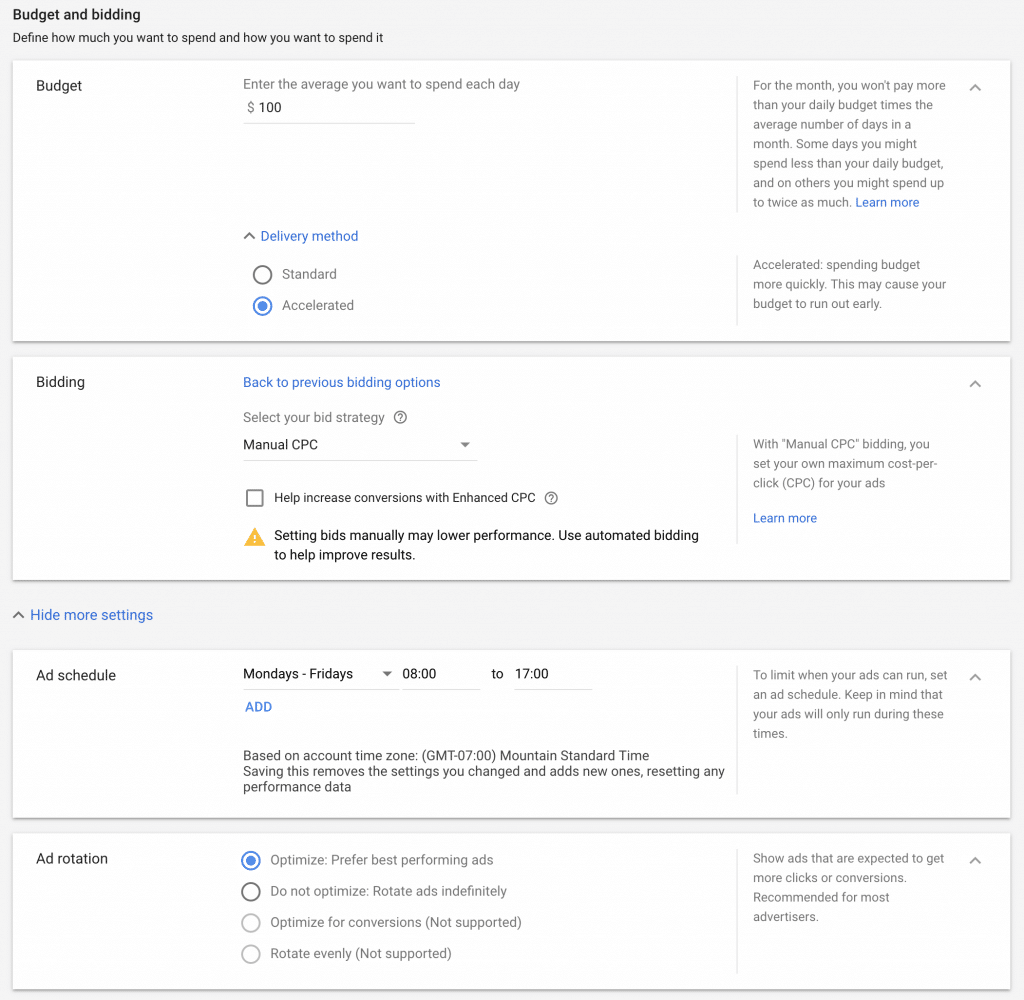
For the budget per day, you can pick whatever you're comfortable with. The smaller the budget, the more time it will take to get the data necessary to optimize your campaign.
I put the delivery method on accelerated, so I'm sure it spends the whole budget each day.
For the bidding strategy I like to use manual CPC, but I know other people who like to use Target CPA or other bidding options.
The ad schedule should be set to the times your offer accepts calls. Do note that most affiliate networks will list the offer hours using EST. So if you're not in EST, you will have to convert the hours of operation to the time zone your account is in.
For the ad rotation settings, this is up to you. In recent months I've liked 'Optimize: Prefer best performing ads,' but I've also used 'Do not optimize: Rotate ads evenly' with success.
The ad rotation setting depends on what you're doing. If you're testing ad copy, it's probably best if you select the option to rotate indefinitely, so your ads each get the same amount of impressions.
The final step in the Google Ads campaign creation process is to add the callout extensions you should have created above in step 6.
Now you will create your ad groups and keywords. The idea here is that you're grouping your keywords in a way that would make sense to show the same ads to all of the keywords.
If a particular keyword in an ad group doesn't make complete sense with the ads in that ad group, it should probably be moved to a new ad group.
There are a million different keyword strategies that people use on the Google Ads platform. Some will only use exact match, some with mix the various match types together, and some may do something else.
For pay per call campaigns, I like to use broad match modified (BMM). The reason being is that people can type some pretty crazy search queries into Google from their mobile phone. If you think about it, you probably do too when you're looking for something specific.
By using BMM, you can potentially get your ads to show more often than using say exact or phrase match. The beauty of BMM is that whatever keyword you put a '+' in front of will be required to be in the searcher's query.
Do note that if someone uses more than ten words in their query, your negative keyword list will be entirely ignored by the Google Ads algorithm.
If you are unsure about what types of keywords you should be targeting for your campaign, use a Google Ads spy tool. Not only can it help with keywords, but it can give you several ad copies other large advertisers are using with success.
In the example below, 'reservation' is required to be in the search query. 'Flight' is not required, but can still possibly be in the search query. Since 'flight' s a broad match instead of BMM, it could match for things like 'airline,' 'delta airlines,' etc.
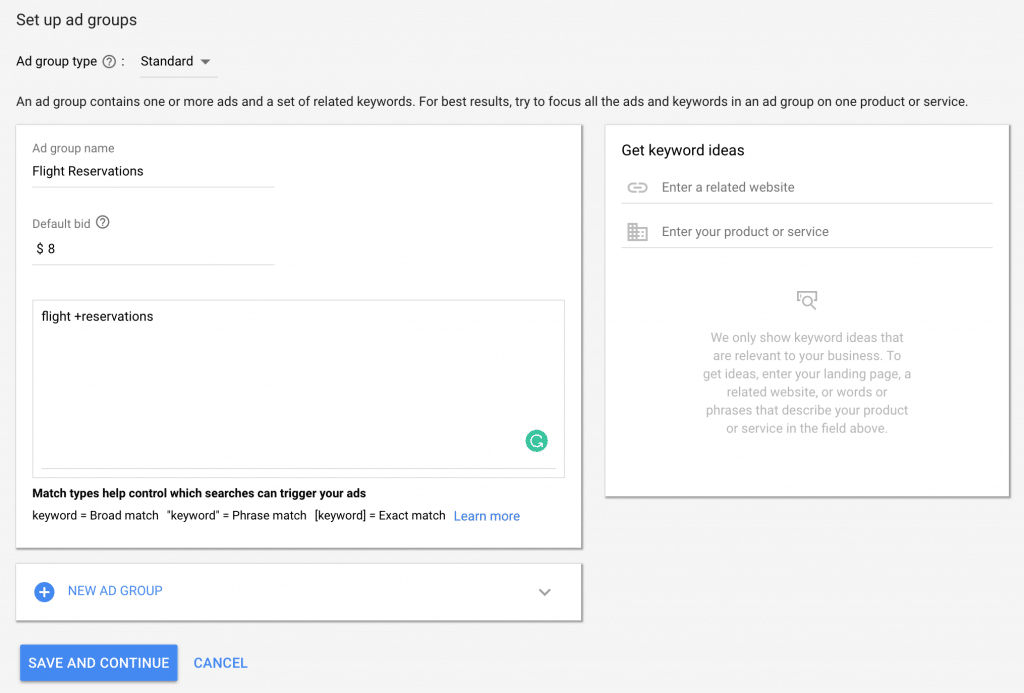
The above keyword would return queries like "delta airlines reservations," "cancel airline reservation," "is my flight reservation on time today," etc.
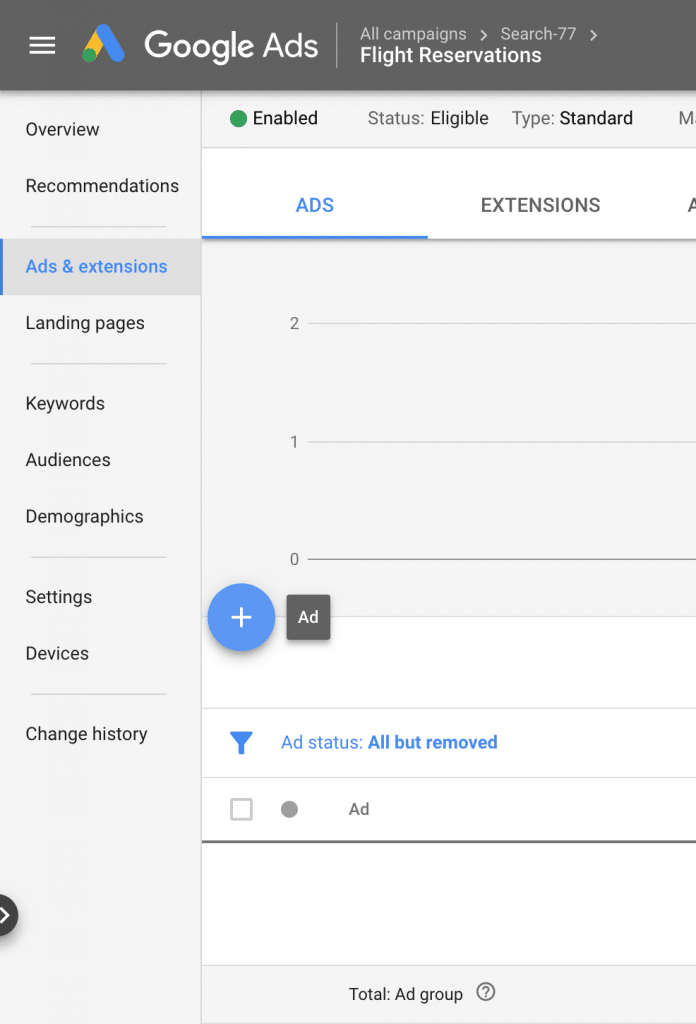
When done creating your ad groups and keywords, click "Save and Continue." You will be taken to a page to create ads, but it won't allow you to create the call-only ads. So click "cancel" and then navigate to each ad group where you need to create ads and add them.
Create your ads. Make sure you change the last dropdown from "calls from ads" to the conversion action we created earlier in step 5.
If you don't change this setting Google Ads will count any phone call as a conversion. We don't want this. We only want Google Ads to count the calls that meet our minimum duration as a conversion.
There is no hard number for how many ads each ad group should have. However, I generally like to make sure there are at least three ads per ad group.
The final step in the campaign creation process is to attach the negative keyword list you created earlier to your campaign.
To do this, click on 'keywords' on the left sidebar, then 'negative keywords' at the top. Select the list(s) you want to use and click 'save.'

Step 9: Wait for Approval from Google Ads
Approval can take anywhere from a few minutes to a couple of days. Usually, it takes just a few hours, and you're approved.
Unless you set a specific start date in the campaign creation process, your campaign will start right away after being approved.
Step 10: Monitor Campaign and Make Adjustments as Needed
Until you get a fully optimized campaign, it won't just be set and forget it. You need to monitor the search queries people use that click on your ads.
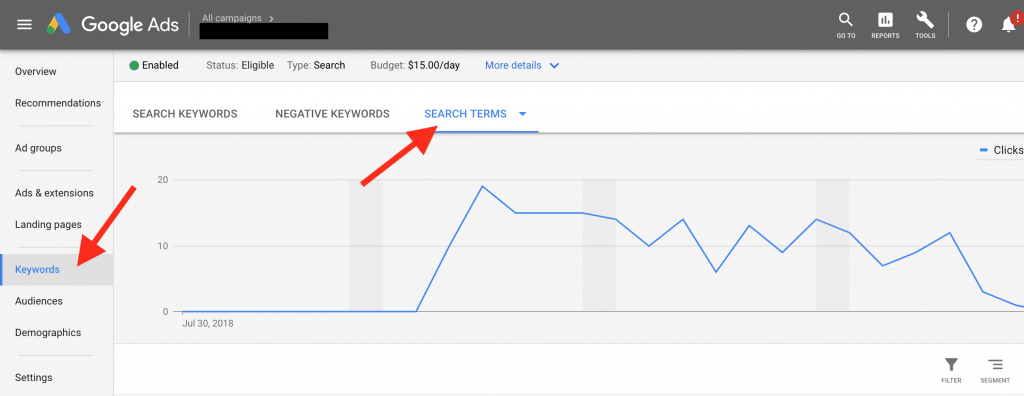
The search queries aren't updated in real-time. So you probably need to do this once a day for the previous day's clicks.
If you notice any pattern, like people looking for a job, you probably want to add negative keywords to prevent your ads from showing for those types of queries.
Don't add negative keywords too fast unless you are confident the quality of traffic is terrible. Sometimes you'll be surprised what kinds of keywords drive the most conversions.
Conclusion
This basic guide to getting started with pay per call affiliate marketing should help you get a campaign up and running.
If you have any questions, or if any part of the guide isn't clear to you, feel free to leave a comment below and I'll reply. You can also check my $57k pay per call case study to see the complete thought process from start to end.