How to Verify Instapage with Google Search Console
When you submit your ads to AdWords for approval, their algorithms do several different checks to make sure you're advertising a website and phone number that's actually owned by you.
There are two different ways they can check this - you've either claimed your website in the Search Console and linked it to AdWords proving that you are the owner, or you create a landing page on your website to serve as a verification page.
It's recommended that you go the Search Console route for the least headaches in the future. If you rely on the verification landing page you'll have to create a new landing page for every phone number you use in your ads.
Today I'm going to show you how to verify Instapage with Google Search Console so that your ads will hopefully get approved without issue.
Step 1: Link Your Site from AdWords to Search Console
From within the AdWords interface, click "GO TO" in the top right corner. Type "Linked accounts" and press enter. After arriving at the below page, click the blue plus sign to link a new site.

Enter in your site's URL. This can also be a subdomain if that's where you're hosting Instapage. Click "Continue".
Now your new site will appear on the Linked Accounts page within AdWords. Click "CLAIM IT AT SEARCH CONSOLE" to start the linking process.

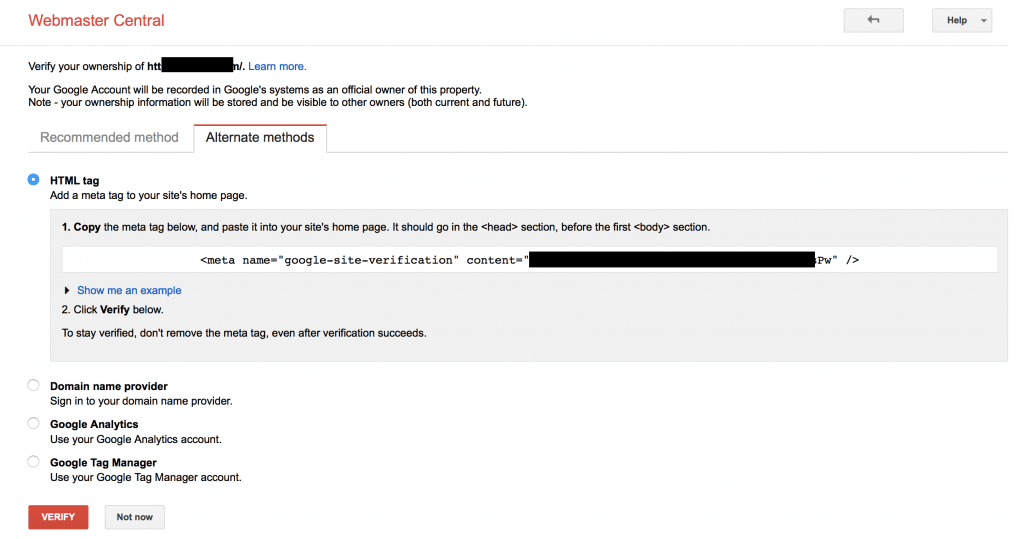
You'll be redirected into Google Search Console. The page you land on will probably recommend that you verify the ownership of your site by doing an HTML file upload. That's how I usually verify a normal website, but since we are using Instapage and don't have FTP access to the domain we have to verify domain ownership a different way.
Click on "Alternate methods" and select "HTML tag". Copy the tag Google provides; we'll need it in a few minutes.
Leave the Search Console page open for now.
Step 2: Create an Instapage "Homepage"
Go to your Instapage dashboard. Once there, create a blank page. You can name it whatever you want; it doesn't matter.
Once created, click "Settings" in the top right hand corner of the landing page builder.

From the drop-down menu, click "HTML/CSS".
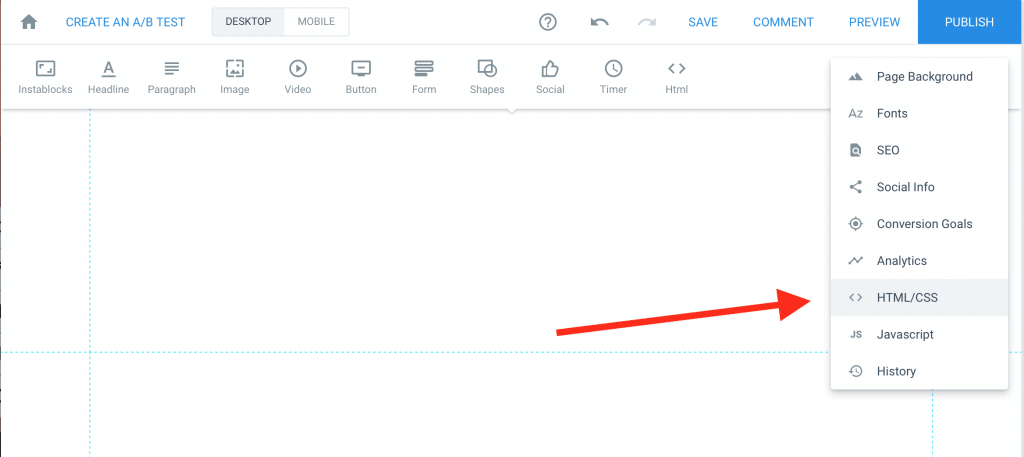
In the head section, paste the code you got from Google Search Console in step 1.

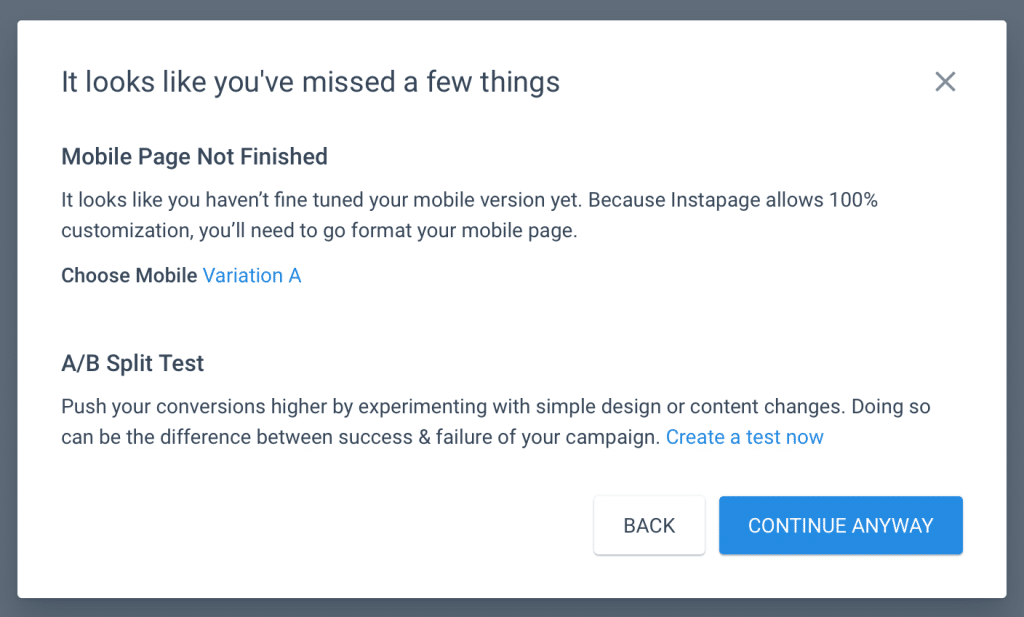
Now you're going to want to publish your page. You'll probably be alerted that you didn't finish the mobile page or setup A/B split tests. Click "CONTINUE ANYWAY", as those aren't needed for verification with Google.
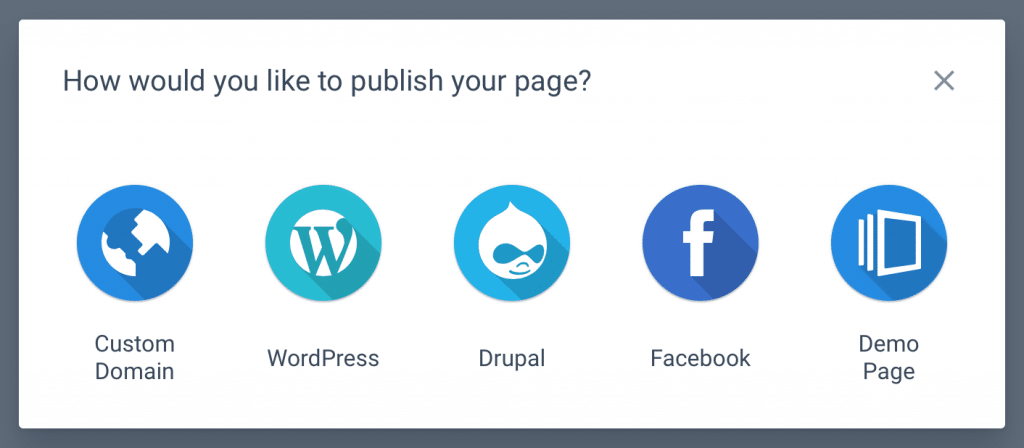
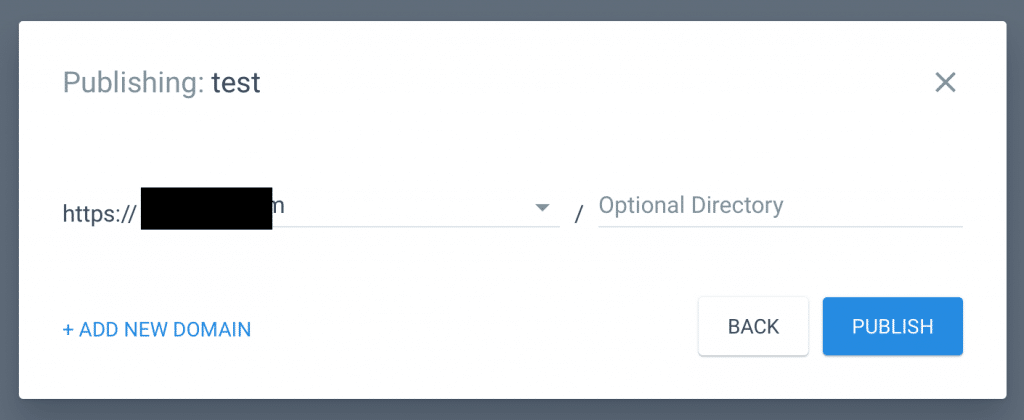
Select "Custom Domain".
Select the domain you're trying to verify with Google Webmaster Tools. Don't put a directory after the domain name. This will force the page you're publishing to act like the home page.
Click "Publish".
Now if you visit https://yourdomain.com you should see a white page. If you were to inspect the code on the page you'd see the HTML tag from Google within the head section.
Step 3: Verify Instapage Website
Now you need to return to the page you left open at the end of step 1. Click the red "VERIFY" button. The Google bot will quickly check your site to see if it finds the code. If it found the code your site is almost verified with AdWords.
Step 4: Make Sure AdWords Recognizes You Linked Your Site to Search Console
The final step is to return to AdWords. Click "GO TO" in the top right corner and type "Linked accounts". The site you just linked above should be listed here.
To fully complete the linking process you may need to click "RETRY LINK" beside the site you're trying to verify. This will have the AdWords system recheck the Google servers to verify you've linked your domain to Search Console.

Now you've successfully verified your Instapage hosted webebsite/landing page with Google Search Console.
