Micro-Conversions - Optimize Affiliate Campaigns with Less Ad Spend
When running CPA affiliate campaigns as an affiliate media buyer we usually test campaigns based on multiples of the conversion payout.
For example, you might spend 10x the offer's payout to test if the offer has enough potential to justify spending even more money at a negative ROI. Once you have enough data you should (hopefully) be able to optimize a promising red campaign into the green.
At least, that's what we all hope...
If you have decent cash flow (a couple of thousand dollars) this should be no problem with smaller payout offers, but what if you want to start testing higher payout offers?
Let me tell you... you're going to need to spend a lot of money to get the data you need to optimize. And that amount of money you need to test a high payout offer will only multiply itself even more if you are testing multiple landing pages, offers, and creatives at the same time.
Direct linking an $800 Bitcoin offer would already cost you ~$8,000 (using 10x payout) just to test if the offer has potential. Add in a handful of landing pages and push creatives and we're talking $30,000+... just to test the potential of this offer.
Don't forget after you've blown through your test budget you'll need the cash flow to keep buying more traffic if the offer shows potential. 🤯
There has to be another way, and actually... there is.
Introducing... Micro Conversions
Micro conversions are small steps the user might take leading up to the actual conversion you're getting paid for by your affiliate network (also referred to as macro conversions in this context).
A micro conversion can be a lot of things, such as a user submitting their email address, completing steps in a quiz, scrolling to a certain point, staying on the page for x amount of seconds, etc.
The possibilities are endless really, but I think you probably get the point.
Typically a user will complete multiple different micro-conversions that lead up to the macro conversion (or, the actual conversion).
An Example:
I'll make an example with the sweepstakes vertical, as it's mostly beginner-friendly and most people should be somewhat familiar with the typical landing pages.
Let's say we've got a typical quiz landing page with 4 questions... the user's flow might look like this:
- Visit landing page
- Answer question 1
- Answer question 2
- Answer question 3
- Answer question 4
- Select the prize
- Click the button to go to the offer page
That flow is a pretty simple example, but it does the job for this explanation. Each of the points (1 - 7) are all micro conversions.
In this case, the user would have to complete all of the micro-conversions leading up to the macro conversion, but it's not always the case depending on how your landing page/website is set up.
What's the Point of Micro Conversions?
You might be thinking something along the lines of "Why would I need micro-conversions when I can just look if someone clicks on my landing page CTA or not?". (landing page CTR)
While that's true and works perfectly fine for simple funnels (ie. click a single CTA button and go to the offer), the real power of micro-conversions comes into play with more complex funnels, such as the ones you'd use for higher payout offers. 😉
Micro conversions may be used to help with conversion optimization in your funnel, which can be extremely helpful to figure out at what point users are dropping off and failing to convert.
If you look again at the example above... maybe people are answering questions 1 and 2, but then dropping off on question 3 and leaving your landing page. With micro-conversions (that actually show up in your tracker) you can optimize/change question 3 (instead of completely trash the landing page) so it doesn't cause most of the engaged users to drop off.
Custom Conversions, Events, or Whatever Your Tracker Calls Them
I could be wrong, but I think Binom was the first CPA tracker that allowed for you to track additional things apart from the typical... CTR, conversions, visits, etc.
Now a bunch of other trackers can do it too, including Kintura, BeMob, and Voluum (let me know if other trackers can too). Binom and Kintura call this feature "Events" and BeMob and Voluum call them "Custom Conversions". 🤷♂️
These custom conversions can be used to track a lot of different things, but unfortunately, the documentation for most trackers isn't very clear or detailed.
Very recently I published a post about using an iFrame... which can be used to direct link offers, but actually track (kind of) like if you used your own landing page. So for this guide, we'll be using that landing page.
Set Up Custom Conversions for Landing Page "Events" in BeMob
But, first things first, let's set up a couple of Custom Conversions inside of BeMob so then we can later add some basic Javascript to the iFrame page that'll allow us to track.
After you've logged into your BeMob account:
- Click the cogwheel in the top right-hand corner
- Click "Custom Conversions"
- Click "+ Event"
- Fill out the pop-up window as you want and click "Save". For this example, we're only filling in the name and the CET parameter value (this value will be used in your Javascript later).
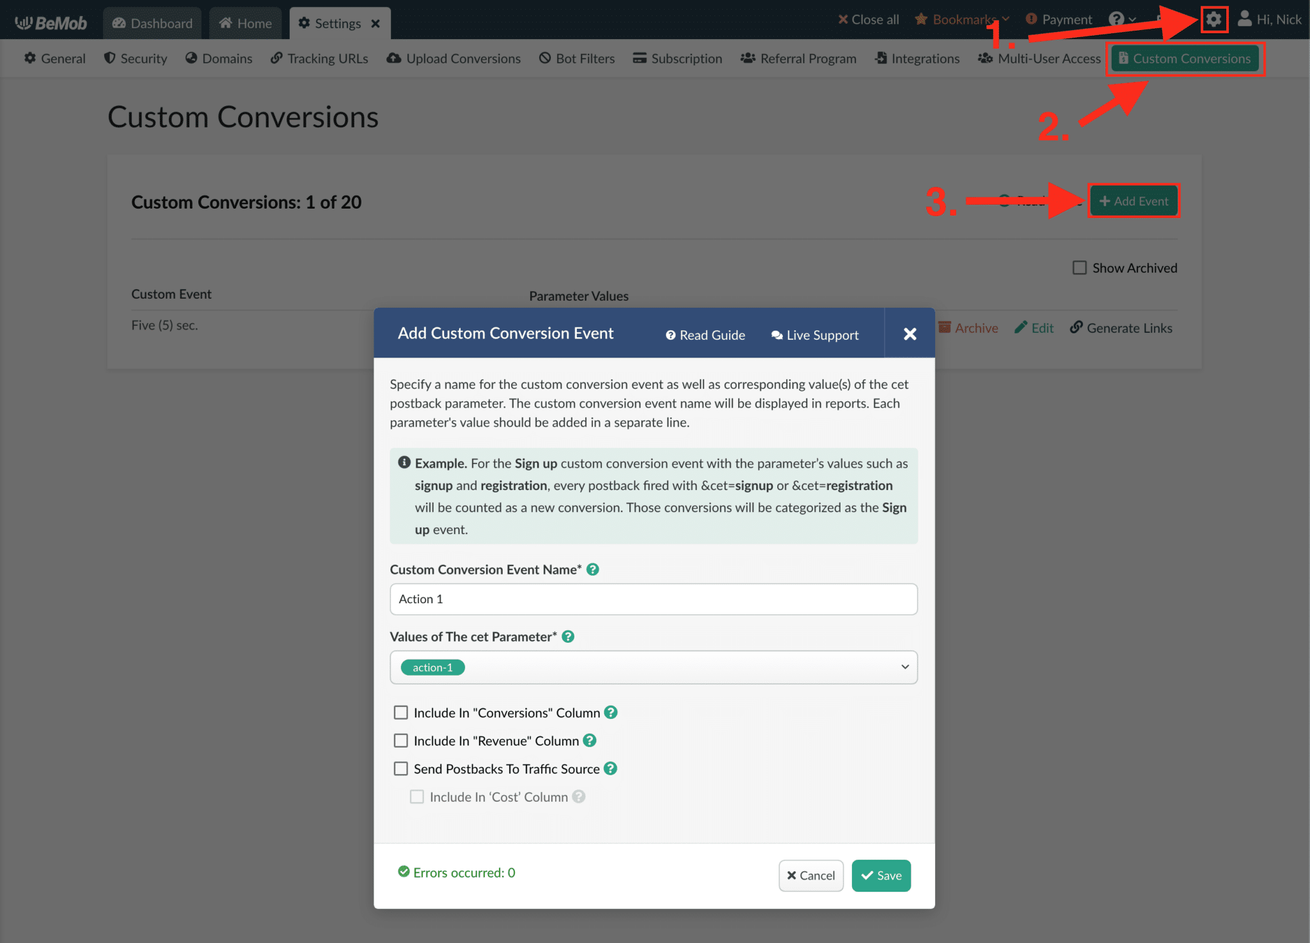
I've set up a total of 2 Custom Conversions:
- action-1
- 5-sec
I'm going to use action-1 when the user interacts with the offer page inside of the iFrame.
The 5-sec Custom Conversion will be triggered if the user stays on the offer/iframe page for 5 seconds... after it has finished loading. Later in this guide, you can modify when the 5 seconds to start however you want.
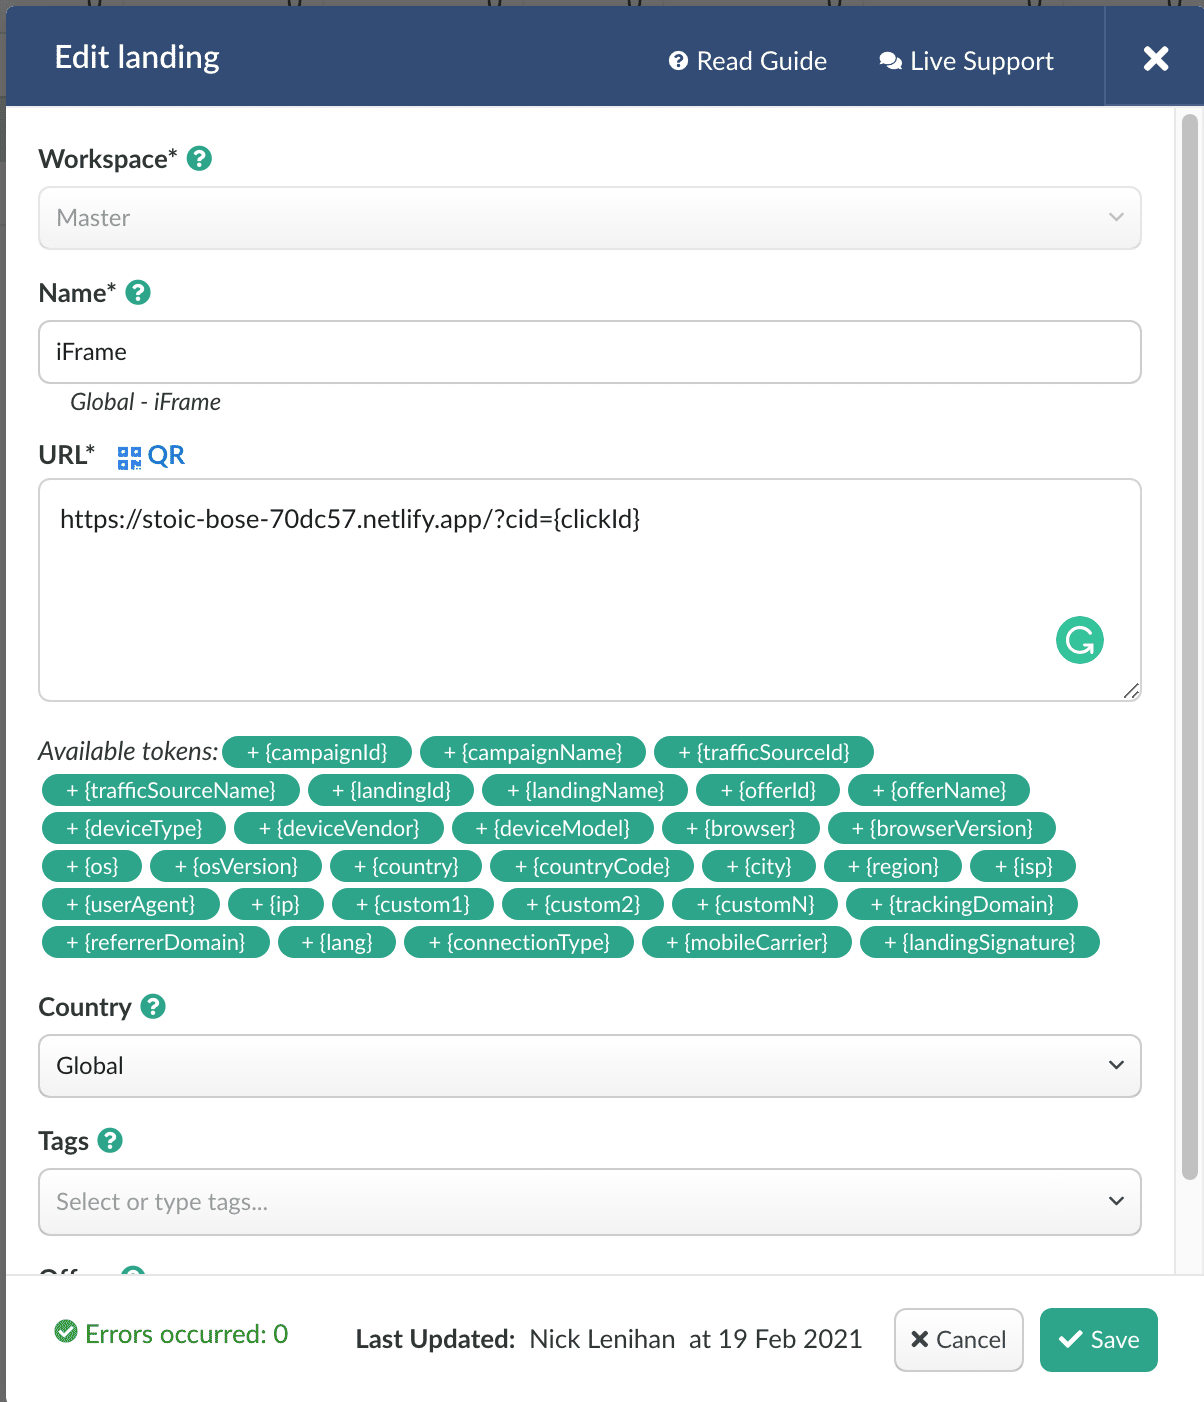
Add + Configure Landing Page URL to BeMob
Add your iFrame landing page (or any other landing page) URL to BeMob like you normally would, but make sure you add the {clickId} parameter.
If you want to follow this guide exactly as I show then simply append ?cid={clickId} to the end of your landing page URL.
Modify iFrame "Landing Page" Code
The first thing you'll want to do is add your BeMob click URL to the iFrame src.

Now we can modify the Javascript that's already on the page between the script tags.
First, let's add a simple function to get the clickId value from the URL:
function getURLParameter(name) {
    return decodeURIComponent(
        (RegExp(name + '=' + '(.+?)(&|$)').exec(location.search) || [, null])[1] || ''
    );
}
Next, we'll add a function to trigger any of your custom conversions:
function sendEvent(event) {
    var img = document.createElement('img');
    img.src = `https://p4e0h.bemobtrk.com/conversion.gif?cet=${event}&cid=${getURLParameter('cid')}`;
    img.style.display = 'none';
    document.body.appendChild(img);
    console.log(`😎 BeMob Event - ${event}`);
    return;
}
Now after the already existing console.log() messages we can trigger our events.
The first Custom Conversion we'll implement is 5-sec. It'll go right after the already existing console.log('👍 The iFrame has finished loading!'); message:
console.log('👍 The iFrame has finished loading!')
setTimeout(function() {
    sendEvent('5-sec');
}, 5000);
Then we'll implement the action-1 conversion right after the console.log('✅ The iFrame was clicked!'); message:
console.log('✅ The iFrame was clicked!');
sendEvent('action-1');
A couple of notes:
- The CET value from when you created your Custom Conversions in BeMob is used in the sendEvent() function (in quotes).
- Any/all console.log() messages can be removed. They're only here for demonstration purposes.
I tried to break the code down so anyone could understand, but let me show you the full Javascript so it's clear how it all comes together (this is the entire Javascript between the script tags on the iFrame landing page):
function getURLParameter(name) {
    return decodeURIComponent(
        (RegExp(name + '=' + '(.+?)(&|$)').exec(location.search) || [, null])[1] || ''
    );
}
function sendEvent(event) {
    var img = document.createElement('img');
    img.src = `https://your.bemobdomain.com/conversion.gif?cet=${event}&cid=${getURLParameter('cid')}`;
    img.style.display = 'none';
    document.body.appendChild(img);
    console.log(`😎 BeMob Event - ${event}`);
    return;
}
document.getElementById('frame').onload = () => {
    document.getElementById('loading').style.display = 'none';
    document.getElementById('frame').style.display = 'block';
    console.log('👍 The iFrame has finished loading!')
    setTimeout(function() {
        sendEvent('5-sec');
    }, 5000);
    window.focus();
    window.addEventListener('blur', function(e) {
        if (document.activeElement == document.getElementById('frame')) {
            console.log('✅ The iFrame was clicked!');
            sendEvent('action-1');
        }
    });
};
// OTHER SCRIPTS/FUNCTIONS CAN GO BELOW HERE
Testing If Your Micro-Conversions Work
Now you're ready to make a campaign and test if you implemented the code correctly.
Create a campaign, copy the campaign URL, and paste it into your browser. On the iFrame landing page trigger all of the custom events. In our case, wait 5 seconds and click on the iFrame'd offer page.
If you enable the custom conversion columns in your BeMob reporting you should see them appear after a couple of minutes:

BOOM! Now you know how you use micro-conversions to optimize your affiliate campaigns with lower ad spend than usual.
This example was done with the BeMob tracker, but the same thing can be done with most other trackers as well. Some setups are almost the exact same, while others may be slightly different.